Introduction
Studio Capture lets you record your screen directly in Canvas Studio, without downloading any extra software. You can record a single browser tab, an application window, or your entire screen, and you can add a live webcam view as a picture-in-picture display. When you finish, your recording saves to your Canvas Studio library so you can share it in your courses.
This guide walks you through opening Studio Capture, choosing what to share, recording, and saving your video.
Note: Studio Capture is not available on Mac computers. Mac users should use Screencast-o-Matic instead (see the link in Step 1).
-
Open Studio Capture
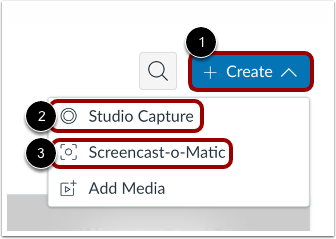
Click the Create drop-down menu [1]. Then, click the Studio Capture link [2].
If you are using a Mac, you can't use Studio Capture and you have to use Screencast-o-Matic to record your screen capture, click the Screencast-o-Matic link [3] and follow these directions: Screencast-o-Matic screen capture application in Canvas
-
Enable Screen Capture
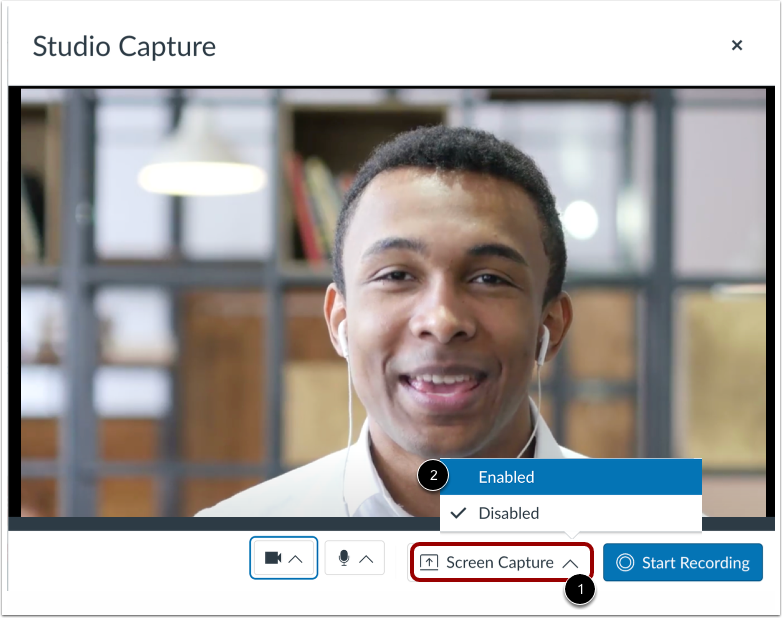
Click the Screen Capture drop-down menu [1]. By default, Screen Capture is disabled. To enable Screen Capture, click the Enabled link [2].
-
Choose What to Share
Review these options and decide which is best for you, depending on what type of content you are recording.
Option 1: Share Browser Tab
To screen share the contents of a tab on your browser, click the [Chrome] Tab option [1]. Then, select a tab name from the list [2].
To share tab audio, click the Also share tab audio toggle on [3].
To begin screen sharing, click the Share button [4].
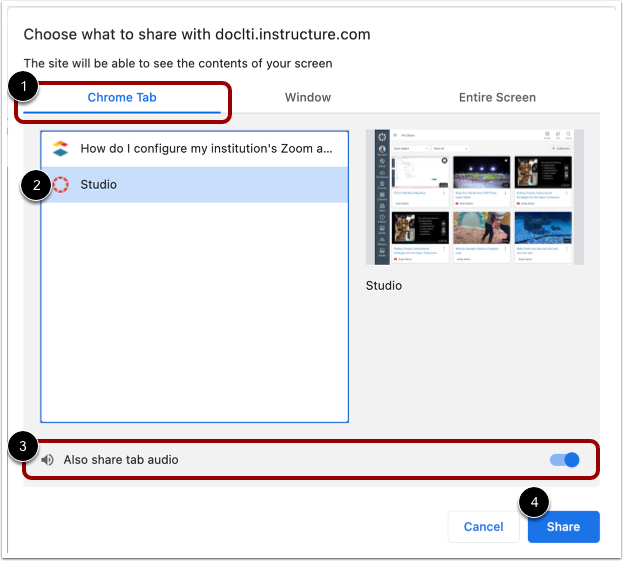
Note: The Share button starts screen sharing only; it does not begin recording.
Option 2: Share Window
To share an entire browser window on your computer, click the Window tab [1]. Then, click the Window Preview tile [2].
To begin screen sharing, click the Share button [3].
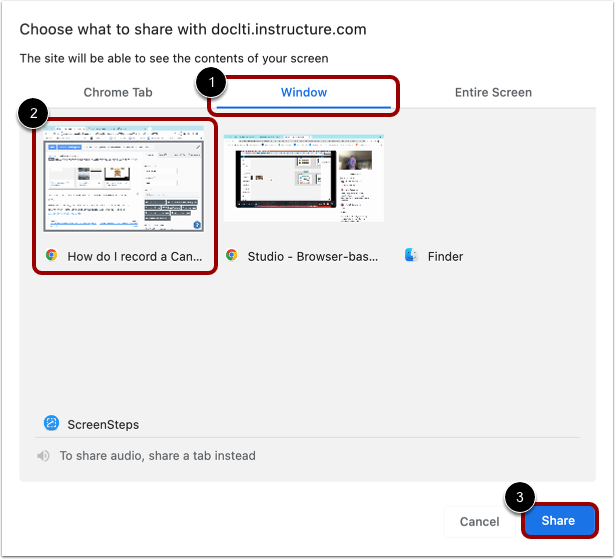
Note: The Share button starts screen sharing only; it does not begin recording.
Option 3: Share Entire Screen
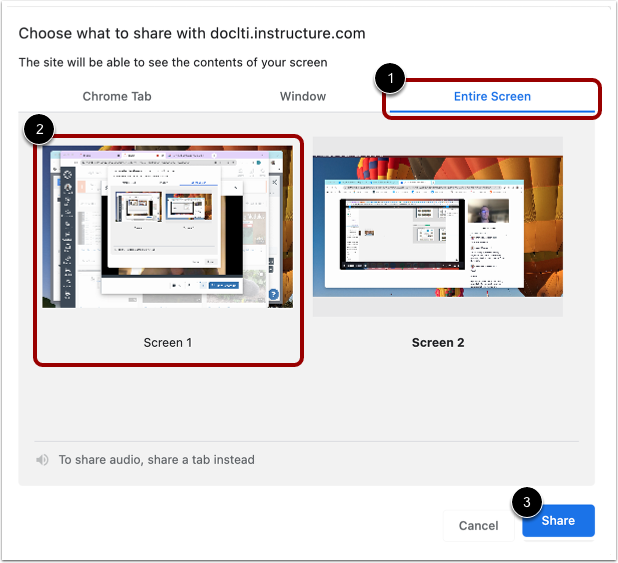
To share your entire computer screen, click the Entire Screen tab [1]. If you have more than one active screen, click the preview tile for the screen you want to share [2].
To begin screen sharing, click the Share button [3].
Notes:
The Share button starts screen sharing only; it does not begin recording.
If you receive an error message when trying to initiate entire screen sharing, check to make sure that your browser has been enabled for screen recording in your computer settings.
-
Enable Picture-in-Picture
You NEED to select the Entire Screen tab in order to enable your webcam during recording to create a picture-in-picture display.
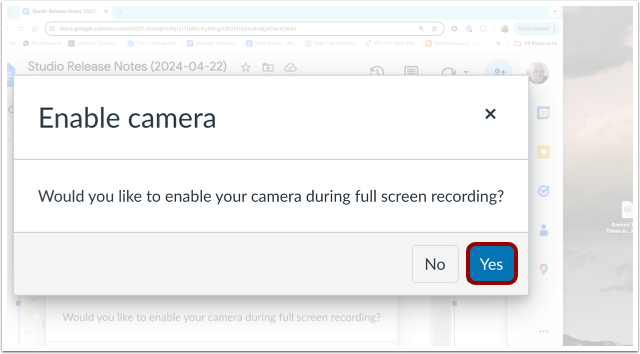
After you click the Share button, the Enable Camera window displays. To enable your camera and open the picture-in-picture display, click the Yes button.
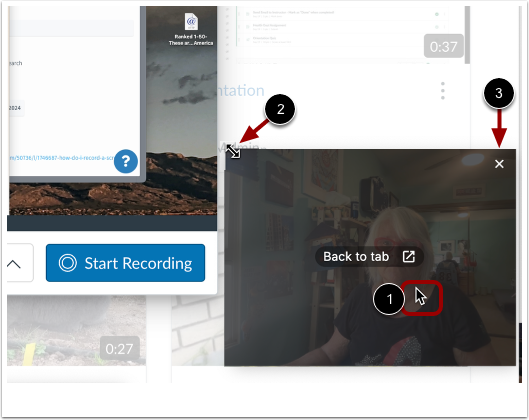
The picture-in-picture window displays a live view from your webcam. To move the picture-in-picture window, click your cursor on the window, then drag the window to a new location [1]. If you need to have your webcam live view in the video, make sure that you drag the window to the screen you're sharing.
To resize the window, click the cursor on a corner of the window to display the Resize icon [2]. Then, drag the corner to resize the image.
To close the picture-in-picture window, click the Close icon [3].
-
Begin Recording
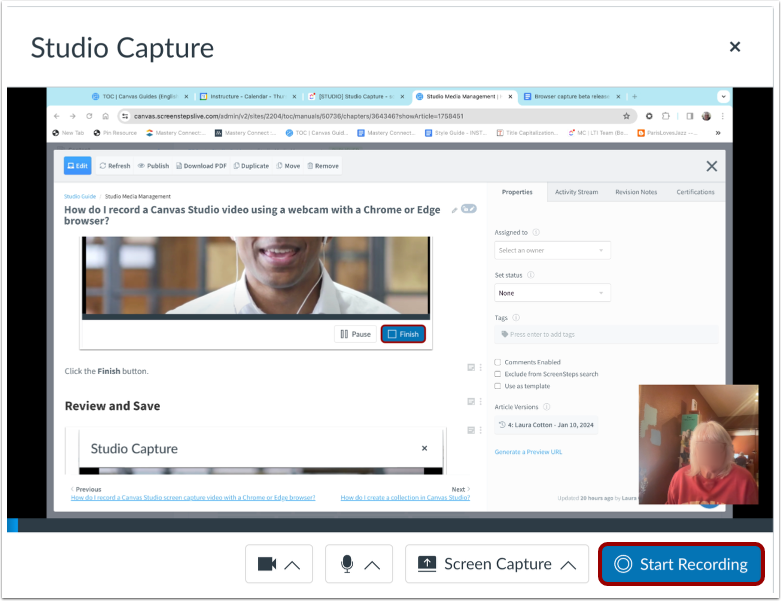
Click the Start Recording button.
-
Pause Recording
To pause recording, click the Pause button. This pauses both your screen recording and your webcam recording.

-
Resume or End Paused Recording
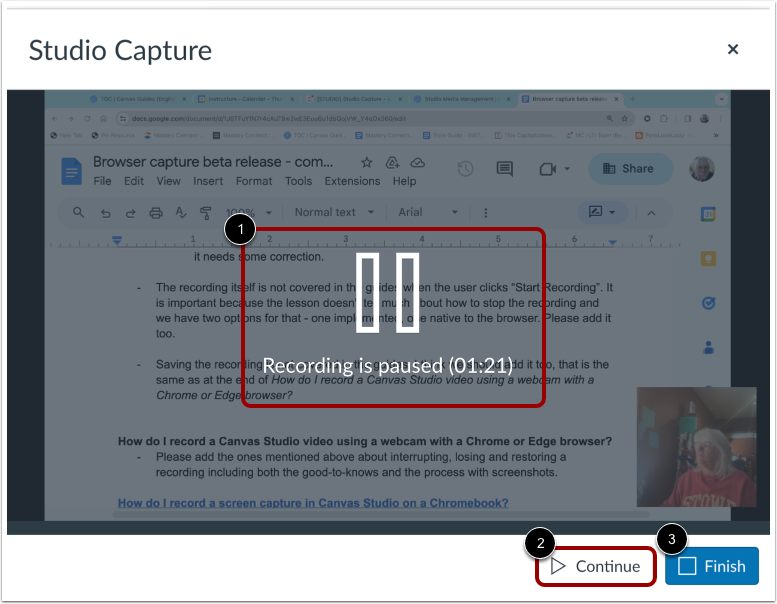
The recording paused message and timestamp displays [1].
To resume recording, click the Continue button [2].
To end the paused recording, click the Finish button [3].
-
Stop Sharing
To stop screen sharing, click the Stop sharing button.

Note: When a recording is in progress, clicking the Stop sharing button ends the recording.
-
End Recording
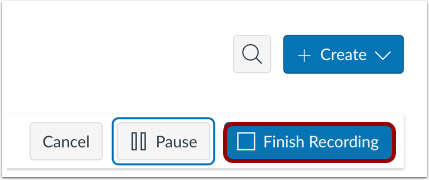
Alternatively, to end a recording that is in progress, click the Finish Recording button.
-
Preview and Save
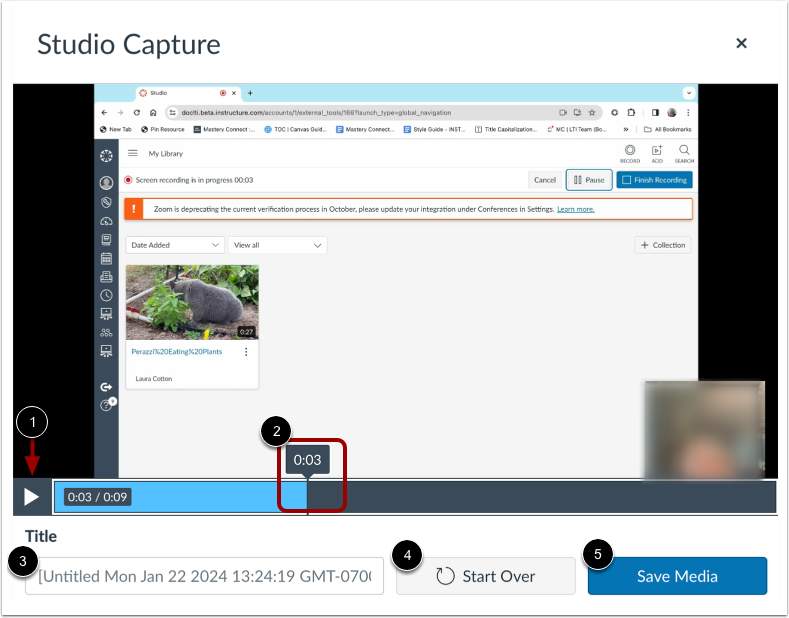
To preview the recording, click the Play button [1]. To navigate forward and back in the recording, hover your cursor over the timestamp bar and slide the cursor to the part of the recording you wish to view [2].
To rename the recording file, enter text in the Title field [3].
To delete the video and begin a new recording, click the Start Over button [4].
To save the recording, click the Save Media button [5].
Have Questions? Contact the Academic Technology Support Team
Phone at 727-341-3500
Academic Technology Support Team Hours: (Monday - Friday 8:30 a.m. - 4:30 p.m. EST).
Want to Schedule a One-on-One or Group Session on Canvas or other instructional technology issues or opportunities?
Schedule 1:1 Support Help with a Member of the Academic Technology Support Team
Other Ways to get Help With Canvas!
After-hours or weekend assistance?
Technical Support Center
Phone at 727-791-2795 or Email: onlinehelp@spcollege.edu
(Mon.- Fri. 8:00 a.m. - 10:00 p.m., Sat 8:00 a.m. - 5:00 p.m., Sun 12:00 p.m. - 8:00 p.m. Eastern).
Related to:
Add comment
Article is closed for comments.